I’m not overly precious about the gear I use. I use what I like and use what I need; in other words, if it gets the job done I’m not opposed to giving it a shot. Sometimes that’s a Sony a7R II and sometimes it’s my (now busted) Zenza Bronica ETR-S shooting 120 film. At the start of the pandemic I got the opportunity to review the (at the time) recently available Fujifilm X-Pro 3 and then everything shut.
Continue readingGear Reviews
Last update on the GX85
Standard
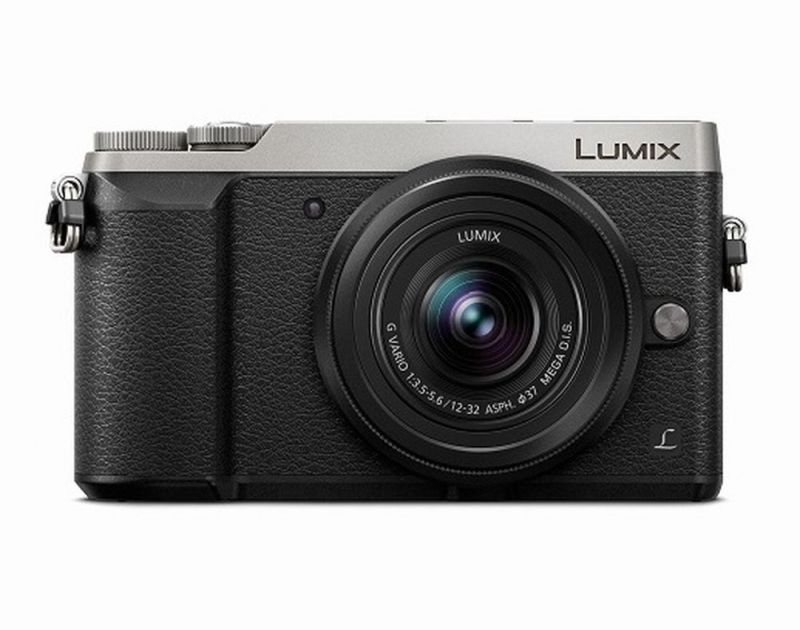
Just before July 4th, I had to send my GX85 in for servicing. For some reason, the shutter blades locked and left the camera in a perpetual loop asking I power down and restart. After some initial problems logging my repair request in, I was able to move forward and even got a response and quote back fairly quickly. Here’s how it all went down.
The Quote Process
After shipping my camera to Panasonic’s repair center in Texas, I awaited to hear something back. Given the fact that it was sent close to a holiday, I didn’t stress when I did not hear back within that first week. I was just happy knowing that the camera was on it’s way and would (hopefully) soon be repaired.
A week after having originally sent the camera, I still had not heard back. I began worrying that I didn’t send it to the correct facility or worse yet, that USPS may have lost it somewhere. After verifying that the package indeed went to the correct location, I checked the Panasonic website – my repair order was marked as canceled. No other information was available. I immediately hit the “Chat Now” button from the Service Request page, as prompted by a pop-up, in hopes that I could get some info on now canceled service order. Various redirecting from the chat representatives and a phone call later, I found out the status of my camera – it was received and sent to the repair facility awaiting a quote number and amount; which is represented in their system as a canceled service order.
Totally not confusing at all. (Yes, that is sarcasm.)
Quoted and Waiting
It’s now mid-July, I’ve finally received the service quote – a reasonable amount just south of $400. So I quickly filled out my credit card info and approved up to the quoted amount. The previous breakdowns in communication prompted me to follow up regularly (one email a week after receiving acknowledgement of signed quote); I was not going to lose track of this new service order. For two weeks the camera sat awaiting a second authorization – the PDF document I had previously emailed was apparently missing information. I will own this one and say that I may not have properly saved the info using Preview (Mac OS’s PDF viewer/editor for you PC people) but having the order hold without contacting the customer falls squarely on Panasonic. It required a third call to Panasonic Customer Care and once squared away I was given some good news, the repair would only cost $225 plus the labor fee ($100). The initial tech’s diagnosis was that the camera only needed a new shutter unit and bracket but the image sensor was undamaged – great news indeed.
The good news would not continue into the following week. The first email I’ve received from Panasonic’s service department was one notifying me that they would need a revised authorization for over $600 in repairs or cancel the order and pay diagnostic and labor fees. A month and a half after having started the process, what I was assured would be a simple and reasonably priced fix became a complicated far more expensive repair that involved replacing the camera’s sensor unit and various other parts.
The End of the Road
At $600 I had to make a decision – sink more money on this camera or cut my loses and try to off-load some of the lenses I’ve picked up for this format. After some deliberation, I had to cut my losses. I asked Panasonic to cancel the order and return the unit. Two bills and some change later, I received my busted camera.
A few things to keep in mind: The GX85 is not a professional body and would not qualify for professional repair service. I was not expecting any kind of white glove service for this repair. I bought this camera at a discount – sales are your friend – but $600+ would’ve been like me buying this unit twice. When the camera was received, the unit powered back on but it still would fail POST about every 3rd or so time it was powered on. After some tinkering and coaching from a fellow DIYer, I managed to have the shutter blades work though there are some focusing issues when shooting video, mostly when using tracking AF.
In the GX85 Panasonic made a very capable entry-level mirrorless camera that can hold its own doing some professional work (and if you go back and read my previous post on the GX85, you’ll know that by no means would I make this my primary camera for commissioned shoots) but the repair service leaves much to be desired. I would strongly recommend that anyone sending their camera in for repair be mindful of the somewhat convoluted ticketing process and the lack of response once the repair process has begun. If this post makes its way in front of the powers that be at Panasonic, I hope you guys can make note of my experience and make some changes that will make this a more seamless process.
A Quick Update on the Panasonic GX85
StandardA while back I wrote my thoughts on the GX85. Unfortunately, since the last time I posted something on the GX85 it started having an issue where it’s stuck in some kind of startup loop requiring me to shut it down and then turn it back on (Error code: 1D10T). After some deliberation, I’ve decided to send it in for repair; this post will help chronicle the process. Spoiler alert: It’s annoying to say the least.
I’ve done some research on this issue and though nothing comes up specifically for the GX85, other cameras (mainly Panasonic’s line of superzoom point-and-shoot cameras) have had these issues. From what I’ve been able to dig up there’s a two-button combination that should bring the camera into a kind of maintenance mode but from there it gets murky. Rather than risk bricking my camera, I decided to send back to Panasonic for repair.
First, I strongly recommend that you register all your products (especially the pricier ones) with the manufacturer. Having all your info in before something goes wrong will help. Especially when you get to questions like “date of purchase.” In the event that this information isn’t readily available you can guesstimate when it was purchased but without proof of purchase your warranty may not be honored. This goes for every manufacturere and not exclusive to Panasonic.
I started the repair request process on my iPad fully aware that an iPad is not a full laptop but I had hoped that there would be a way to go back into an existing request after saving or entering the necessary information. I learned the hard way that this was not the case and all the information I had previously entered ended up on Panasonic servers with no way for me to update any of the previously entered data or to reprint a confirmation page (which is required when sending back the product). After getting some direction via their live chat option (two days later mind you), I had to go back and start a second repair request to make sure I print out a copy of the confirmation page.
Panasonic, please accept the following bit of constructive criticism: If a copy of the confirmation page is a requirement for any service order, make it available either by logging into your account or automatically sending it to the email you requested in the service order ticket. This should not be aside that a customer has to figure out or wait for regular working hours to have a rep explain this. Yes, I accept responsibility for not printing my confirmation the first go-round but sending an email should be standard. The package will be on its way to Panasonic tomorrow morning, hopefully this will be the only hiccup in getting my camera working again.
Samsung’s Beast Mini aka the NX500
StandardIt’s been a little over two months since I first got the NX500 in my hands. After long NY winter shooting with the NX1 on a near daily basis it was refreshing to have a camera that was light enough to drop in my messenger bag and forget it’s there. Just because the camera lost some of its size, it by no means lost any of its power. Read on for some of my impressions on the NX500 and some sample images.
Disclosure Notice: I’m part of Samsung’s Imagelogger program in which they send me shiny new cameras to try and take many, many pictures with. This is not a paid placement; all opinions from here on are my own.
When I first took the NX500 out of the box I was absolutely floored by how light it is. Sure, I absolutely get that it is a (relatively) tiny camera but I still can’t get over the technology that powers it. Inside the small and svelte frame is a 28-megapixel back-side illuminated APS-C sensor and DRIMe 5 image processor – the very same sensor and processor combo found in the larger (more expensive) NX1. The NX500 is capable of capturing 9fps in full resolution and comes with a gorgeous 3-inch AMOLED touch display and boasts 209 auto-focus detection points. When combined with the NX500’s Hybrid Phase Detection AF system, those 209-phase make for speedy changes in focusing that make shooting 4k video on the NX500 a dream.
Ultimately the biggest reason that I’ve fallen in love with the NX500 is that much like the NX300, the NX500 has allowed me to disappear into the background and capture those fleeting moments of city life without drawing too much attention to myself. For my style of shooting, I’d gladly give up a viewfinder for a chance to capture my subjects without drawing too much attention to myself. The NX500 is my current favorite camera for my street photography and it’s clear to see why; you don’t have to take my word for it, check out the gallery below for more photographs made with the NX500 and be sure to leave a comment.
If you’re ready to dive into the world of 4k video and pick up one of the best APS-C cameras under $800 consider shopping via the link below. It helps me keep the lights on and writing more posts like this one. Thanks again for your support.
Samsung NX1 – First Impressions
StandardThe Samsung NX1 is the latest flagship NX-mount interchangeable lens camera from the Korean electronics manufacturer. It promises to be high-level piece of kit with 15fps of continuous shooting and more AF points than any other camera, the NX1 is looking to dominate the mirrorless market and make some converts out of the tied and true DSLR pros and high-end enthusiasts; but can it deliver?
Disclosure notice: I am a participant in Samsung’s Imagelogger program and will periodically get gear sent to me. No monetary compensation has been provided for this post or any other post on this site. The following hands-on impressions are my own.
The Specs
- 28.2MP BSI APS-C CMOS Sensor
- DRIMe V Image Signal Processor
- 4K Video Recording at 24 fps
- UHD Video Recording at 30 fps
- 3.0″ 1036k-Dot Tilt-Touchscreen Monitor
- 2360k-Dot XGA OLED Electronic Viewfinder
- Advanced Hybrid Autofocus System
- 205 Phase-Detection AF Points
- 15 fps Burst with AF
- Includes Adobe Photoshop Lightroom 5
Hitting the streets
On a rainy and cold November afternoon I took the NX1 to the Union Square area in New York City. One of the features that caught my eye on the NX1 was the weather-sealed magnesium body. Make no mistake this feels like a metal bodied camera and I love it. This isn’t like one of those cameras that’s weather-sealed but feels a bit too plasticky in your hands. There’s a heft to the camera – significantly heavier than my NX30 but still nowhere near as bulky as a traditional DSLR.
Having been familiarized with the NX system of cameras the menu system is familiar and settings can be accessed through a variety of ways from physical dials on the camera and i-Function button on the lens to a few screen taps on the gorgeously large Super AMOLED display. Seriously it’s an amazingly bright and sharp display. Probably one of the best I’ve seen on a camera.
As mentioned above the NX1 has a plethora of physical controls to help you get the shot you’re looking for without taking your eyes off your subject. The addition of a mode lock button on the top right and a separate dial for drive selection on the top left are new and welcomed additions to the camera body. The rear buttons are in familiar places with a few notable exceptions – having been shooting with the NX30 I’ve grown accustomed to being able to toggle between video and stills with a dedicated button where my right thumb would rest and adjust certain settings like AF and ISO with a tap on the jog dial found to the right of the display. These have been moved out of the box but can be designated through the settings menu. I’ll be exploring this in more detail at a later date.
During my first outing I found that the NX1 delivers the goods – quick autofocusing (though admittedly Continuous AF seemed a step quicker than Single AF) and even after a day of shooting out in the rain (no protection) the NX1 never missed a step. I was only able to spend a couple of hours and managed to get around 125-150 images and still have around 90% of the battery. The flip up screen was helpful in getting low shots and shooting from the hip (zone focusing folks. Zone focusing) though I admit that I prefer the swivel screen from the NX30; after seeing both side by side though I’ll take the sharper display over the swivel screen.
The Wrap Up
Keeping in mind that this is an APS-C “crop sensor,” in all honesty the NX1 can deliver some seriously sharp images in low light that have only been seen in full-frame cameras. The weight savings, even with the heavier combo of NX1 body and NX 16-50mm S Lens, makes this a serious consideration for the pros in the audience that may be a bit skittish about carrying around a “crop sensor” body instead of a full-frame. From my first few shots I’m hooked on this beast of a camera; definitely looking forward to bringing you a more thorough once over.
Like what you’ve read so far? Help keep the lights on and consider purchasing via the affiliate link below:
Samsung NX1 28.2 MP Wireless SMART Compact System Camera with 16-50mm f/2.0-2.8 “S” Lens
Gear Watch: Olympus E-PL7
StandardWhile you were sleeping, Olympus announced their latest addition to the Pen Lite lineup – the Olympus E-PL7. Beating the Photokina madness and hoping to win over consumer mindshare early, Olympus pulled the veil off their mid-range micro four-thirds camera that boasts three-axis in-body image stabilization, a 16-megapixel sensor powered by the TruePic VII processor, in-camera WiFi, and an all new 180-degree flip down selfie touchscreen. All in a small package then the previous version of Pen-Lite cameras. Continue reading